Automating app store graphics creation for Flutter apps
Creating app store graphics could take up a lot of your time and energy. Flutter widget tests can help you to generate these images. It might not be a typical way to use widget tests but if it works it’s not stupid, right?
Why do it with widget tests?
-
To save time. You don't have to manually click through the app to reach the right screen and get it to the right state. Perfect screenshots can be taken every time for any app state needed. Automation helps saving and respecting other people’s time: designers don't have to spend hours editing hundreds of screenshots just to add a device frame and localized text.
-
Flexibility. It works with any configuration: different screen sizes, locales, dark\light themes, text directionalities. Let computer do the boring work of setting configuration and taking screenshots.
-
Works for any configuration. No need to own various devices, no need to launch gazillions of emulators to make a screenshot of the right size. All screenshots can be taken on one platform.
-
Automation. You can create new screenshots after every new release, without having to manually repeat the process. This ensures that your screenshots are always up-to-date.
What do I do to make it work?
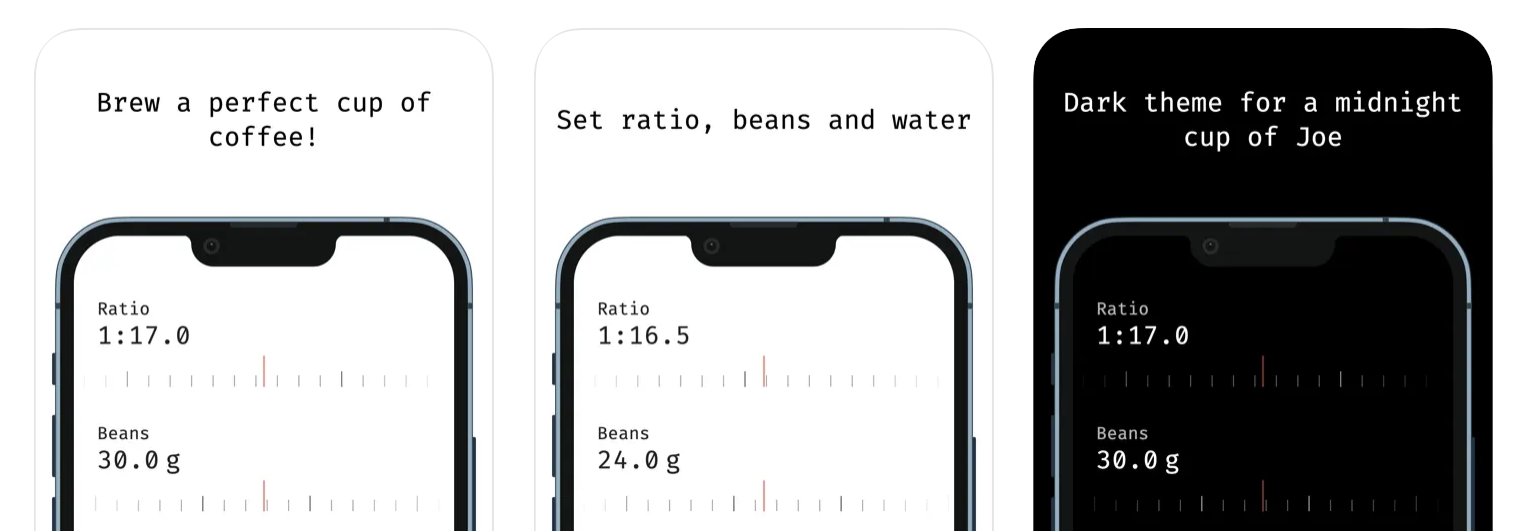
There are several steps to make it work. I’m going to use my simple coffee ratio calculator app called Ratio M8 as an example how to create graphics for Apple's App Store. Code samples in this article are simplified for better readability. App is not open source but screenshot generator's code is available on Github.
Step 1. Make app testable
This step depends highly on the way your app is built. You need to make your app testable, make it possible to show the app state for which you want to take a screenshot.
In my case it was easy because the app is very simple and uses Riverpod that allows overriding providers like this:
// Return custom state from shared preferences
// Ratio is 1:16.5, Beans: 24 grams, the rest is calculated
final model = MockPreferencesModel(16.5, 24);

await tester.pumpWidget(
    ProviderScope(
        overrides: [
            preferenceModelProvider.overrideWithValue(model),
        ],
        child: const App(),
    ),
)
Sometimes it’s enough to simply pump a widget you want to take a screenshot of. Sometimes you need to have a widget test that goes through the app and clicks various items. And sometimes you need to take care of your platform-specific dependencies.
Step 2. Show actual texts
As you probably know, Flutter widget tests use a different font from what you use in the app. If you create a screenshot from what’s on the screen without this step it would look like this:
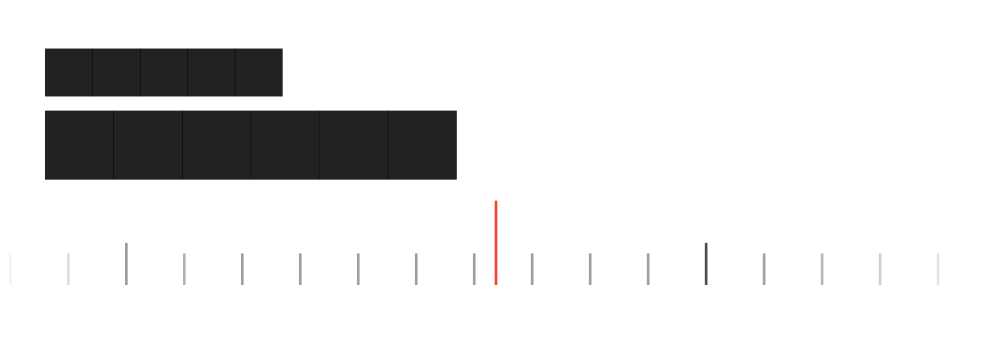
The trick is to make the app in your tests look nicer by loading actual fonts before running tests:
final fira = rootBundle.load('assets/fonts/fira_code_regular.ttf');
final loader = FontLoader('Fira')..addFont(fira);
await loader.load();
Text widgets that use this font family will now be rendered correctly.
Optional: add device frame and add text
Before taking a screenshot, it’s possible to wrap app into a device frame, add text or other content and apply effects and transformations.
In this example I simply wrap the app widget into an iPhone 13 frame using device_frame package and add a caption:
ColoredBox(
    color: Colors.white,
    child: Column(
        children: const [
            Text('This is some caption'),
            DeviceFrame(
                device: Devices.ios.iPhone13,
                screen: App(),
            ),
        ],
    ),
),
Step 3. Take a screenshot
Last touch before taking a screenshot is to add RepaintBoundary widget around the test app:
RepaintBoundary(
    key: rootKey,
    child: screenshotContent,
),
Finally a screenshot can be taken and saved to a file:
final boundary = tester.renderObject(find.byKey(rootKey));
final image = await boundary.toImage();

final file = File('my_image.png');
final byteData = await image.toByteData(format: ui.ImageByteFormat.png);
await file.writeAsBytes(byteData!.buffer.asUint8List());
Run the test and voilà! Screenshot including device frame and everything inside RepaintBoundary
is saved as my_image.png.
Notes
-
Navigation bar, status bar and other platform UI elements are not captured and have to be added as an image on top of the app screenshot if needed. This could be a part of the screenshot generation code.
This solution most likely doesn't work with Flutter’s platform views.
As any other test and automation, some initial work has to be done to make it work.
Similarly to other tests this code needs to be maintained.
Conclusion
It may seem easier to use a real device or emulator to create screenshots rather than spending hours writing code. It might be true if you take screenshots once when app is initially released. In a long run with constantly updating configurations and app changes, it’s worth investing into automation like this.
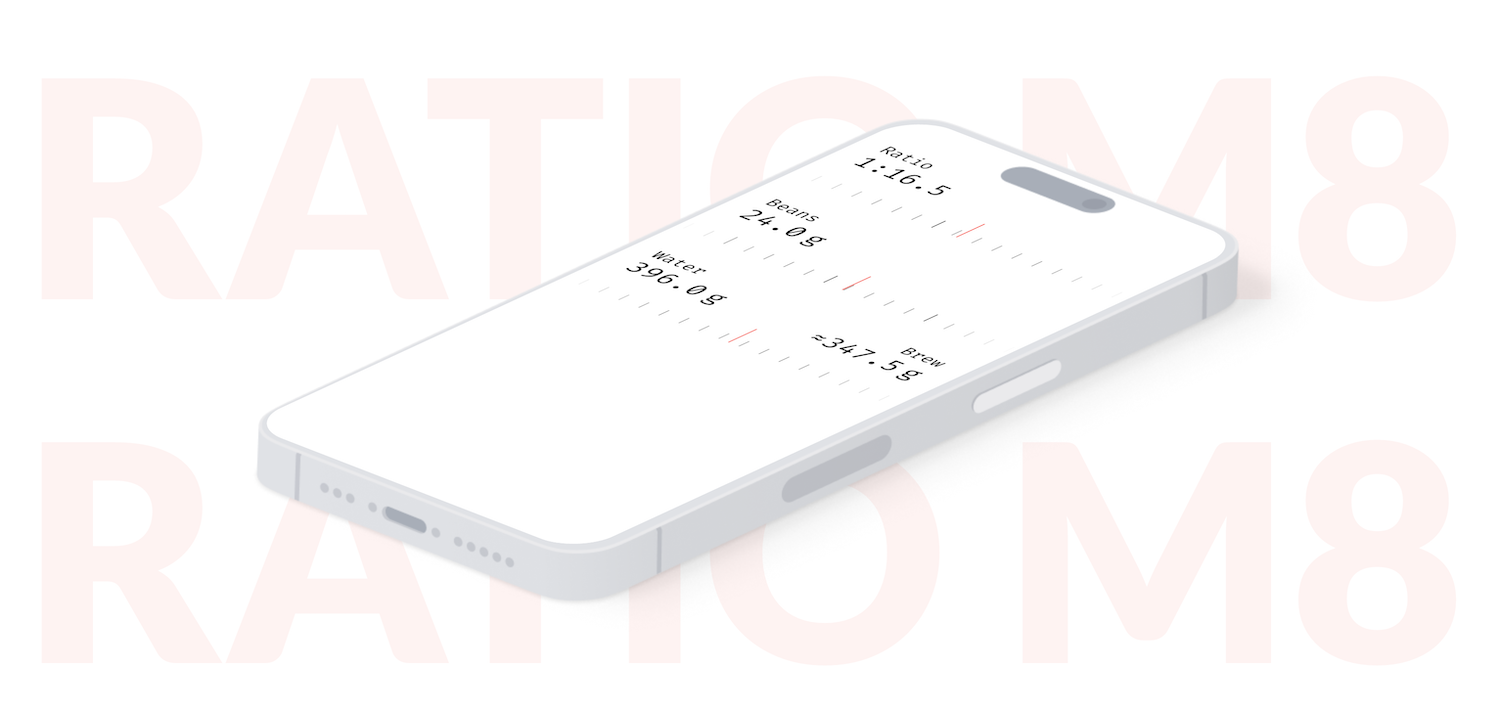
App store images don’t have to be frame-and-text-boring as shown in the example above. You can create more engaging images. For example, a screenshot embedded into an isometric device
frame using Flutter’s Transform
widget: